Minecraft is a popular sandbox video game that allows players to explore, build, and survive in a blocky world. Building a shelter is one of the most important things to do when starting a new Minecraft world. A shelter will protect you from the elements, mobs, and other players.
In this article, we will show you how to build a basic shelter in Minecraft. We will cover the following topics:
- Choosing a location for your shelter
- Gathering the materials you need
- Building the walls and roof of your shelter
- Adding a door and windows
- Furnishing your shelter
- Tips for survival
Choosing a Location for Your Shelter
The first step to building a shelter is to choose a good location. Your shelter should be in a safe place protected from the elements and mobs. It should also be close to a source of food and water.
Here are some tips for choosing a location for your shelter:
- Choose a flat area of land. This will make it easier to build your shelter.
- Choose a location that is near a source of wood. You will need wood to build your shelter.
- Choose a location that is near a source of water. You will need water for drinking and cooking.
- Choose a location that is away from cliffs and other dangerous areas.
- Choose a location that is not in the middle of a forest. Forests are home to many mobs, including spiders, creepers, and skeletons.
Gathering the Materials You Need
Once you have chosen a location for your shelter, you will need to gather the materials you need to build it. The most important materials are wood, stone, and dirt.
Here is a list of the materials you will need to build a basic shelter:
- 100 wood planks
- 50 stone blocks
- 30 dirt blocks
- 1 door
- 2 windows
- 1 crafting table
- 1 furnace
- 1 chest
You can obtain wood by chopping down trees with an axe. You can obtain stone by mining it with a pickaxe. You can obtain dirt by digging it up with a shovel. You can obtain a door, windows, crafting table, furnace, and chest by crafting them.
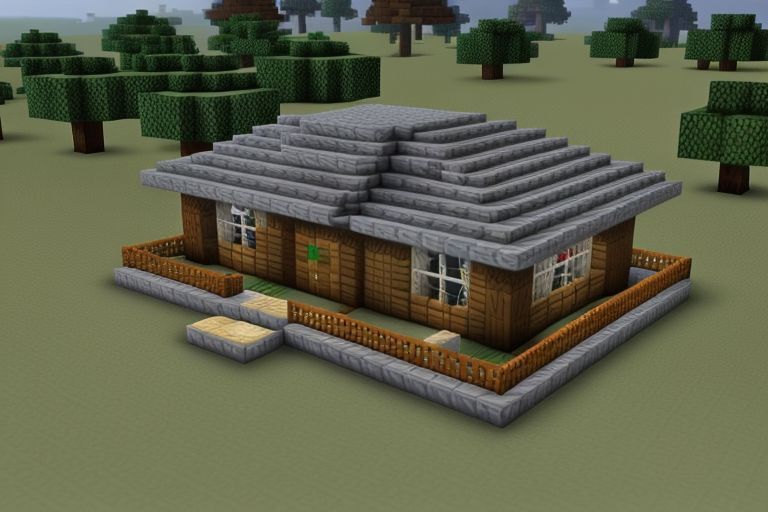
Building the Walls and Roof of Your Shelter
Once you have gathered the materials you need, you can start building your shelter. The first step is to build the walls of your shelter. The walls should be made of wood or stone. The walls should be at least 3 blocks high.
Once you have built the walls of your shelter, you can build the roof. The roof should be made of wood or stone. The roof should be sloped so that water will run off of it.
Adding a Door and Windows
Once you have built the walls and roof of your shelter, you can add a door and windows. The door should be placed in the front of your shelter. The windows should be placed on the sides of your shelter.
Furnishing Your Shelter
Once you have built the walls, roof, door, and windows of your shelter, you can furnish it. You can add a crafting table, furnace, chest, and other items to your shelter.
Tips for Survival
- Build your shelter in a safe location.
- Gather the materials you need to build your shelter.
- Build the walls and roof of your shelter.
- Add a door and windows to your shelter.
- Furnish your shelter.
- Explore your surroundings and find food and water.
- Craft tools and weapons to help you survive.
- Be careful of mobs.
- Use your shelter to protect yourself from the elements and mobs.
Building a shelter is an important step in surviving in Minecraft. By following the tips in this article, you can build a basic shelter that will protect you from the elements, mobs, and other players.
Additional Tips
- You can use different materials to build your shelter. For example, you can use cobblestone, brick, or sand
- Once you have built a basic shelter, you can start expanding it to make it more comfortable and functional. Here are some ideas for expanding your shelter:
- Increase the size of your shelter. You can make your shelter larger by adding more rooms. This will give you more space to store your belongings and craft items.
- Add a floor. You can add a floor to your shelter by placing blocks on the ground inside your shelter. This will make your shelter look nicer and keep you from getting dirty.
- Build a chimney. You can build a chimney on your shelter to allow smoke from your furnace to escape. This will help to keep the air inside your shelter clean.
- Create a farm. You can create a farm near your shelter to grow food. This will provide you with a steady source of food and help you to survive in the long term.
- Build an animal pen. You can build an animal pen near your shelter to keep animals safe. You can breed animals in your pen to get food and other resources.
- Light up your shelter. You can light up your shelter with torches or lanterns. This will help to keep mobs away from your shelter at night.
- Beyond the Basics
- As you become more experienced in Minecraft, you can start to build more elaborate shelters. Here are some ideas for more advanced shelters:
- Underground shelters. You can build your shelter underground. This will provide you with excellent protection from the elements and mobs.
- Tree houses. You can build your shelter in a tree. This will give you a great view of your surroundings and help you to avoid mobs on the ground.
- Water shelters. You can build your shelter underwater. This is a challenging but rewarding project that will provide you with a unique and safe place to live.
- Redstone contraptions. You can use Redstone to create automated contraptions for your shelter. For example, you could create a Redstone door that opens automatically when you approach it.
- With a little creativity, you can build a shelter in Minecraft that is both functional and stylish. By following the tips in this article, you can create a safe and comfortable place to live in the world of Minecraft.